Pastel Chalks: Features and Tips to Apply Them
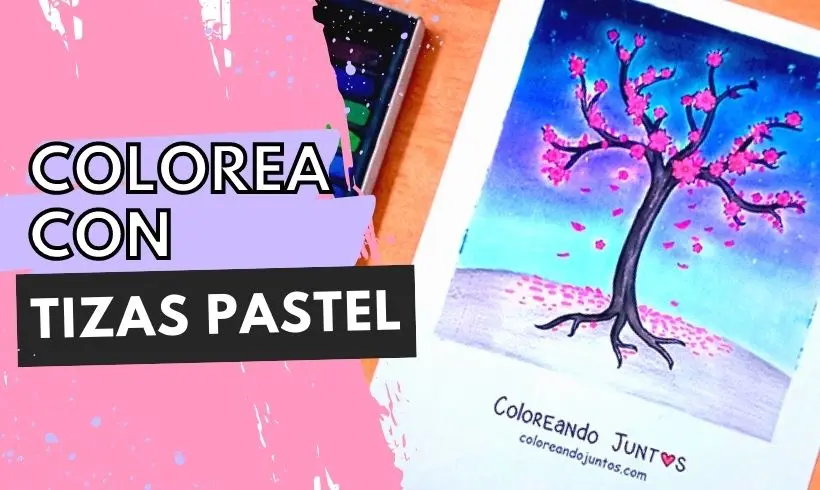
Are you ready to start creating? Welcome to this section of Coloring Together. This time we will teach you how to use one of the most amazing materials of all, not only for its unique properties, but also for the incredible results you get from it.
So that you can leave with all the knowledge our artists have, we made this space dedicated to how to color with pastel chalks, with a step-by-step guide and tips you can take advantage of. Let's paint with pastel chalks!
What are Pastel Chalks?
Pastel chalks are an artistic material that comes in the form of a stick or bar, and that consists of binder pigment powder. It is a material that gives a dry and long-lasting finish, thanks to the intensity of its pigment.
Pastel chalks are made from bound pigments, which are then turned into paste and held together by various substances, such as gum arabic.
Depending on the pigments used during their manufacture, the quality of the pastel chalks will differ, as will the intensity of their color.
The amount of pigment that will be deposited on the surface will vary depending on the pressure you apply, which is why pastel chalks are an ideal material for creating effects that require fine and soft lines.
Origin of the pastel chalk
The origin of pastel chalks is not really known, neither where they came from nor who started using them. However, it is said that the Italian artist Jean Perréal was the first to use this technique, around the year 1502.
This impressed Da Vinci, who mentioned the technique at the end of the 16th century. It was called pastel, and it belongs to the group of dry techniques, since pastel chalks are a material that does not need a solvent to be used (unlike watercolors).
This technique developed in France and Italy at the end of the 16th century, and its golden age began in the 17th century thanks to the art of portraiture, by masters such as Charles Le Brun or Robert Nanteuil.
Pastel Chalk Artists
Artists such as Leonardo Da Vinci, or Michelangelo, used natural chalks and clays to draw. From these techniques and materials, pastel painting was developed.
Jean Honore Fragonard and Jean Antoine Watteau were artists who turned to pastel chalks to draw the sketches of their portraits. Later it became popular with the works of impressionists such as Edgar Degas, William Merrit Chase, and others.
By the 1650s the artist Robert Nanteuil achieved a less graphic and more pictorial effect in his compositions. Nanteuil applied a range of pastel colors similar to the style of oil paintings.
Types of Pastel Chalks
- Hard pastels: These are a type of pastel bar that have much more binder than others, so they tend to be harder and more resistant. They are ideal for making sketches or adding touch-ups.
- Soft pastels: These have less binder, so they have the particularity of spreading more easily, and the color they have is very intense. But be careful! If you apply too much pressure they can break.
- Pastel pencils: These are pencils with pastel chalk pigments inside. It is a very delicate type of chalk because the tip can break easily, but thanks to them you can make small and delicate details.
- Oil pastel: These types of pastel chalks use a greasy binder, which is why they let you spread the color like a paste across the entire surface. However, it is a type of material harder to blend than conventional chalks.
How do you color with Pastel Chalks?
If you have made it this far, it is because you want to learn to color with pastel chalks. It really is quite a challenge! But do not worry, we will explain step by step how to color with pastel chalks.
Remember: there is no single style, so take this as a guide and dare to experiment with the chalks on your own.
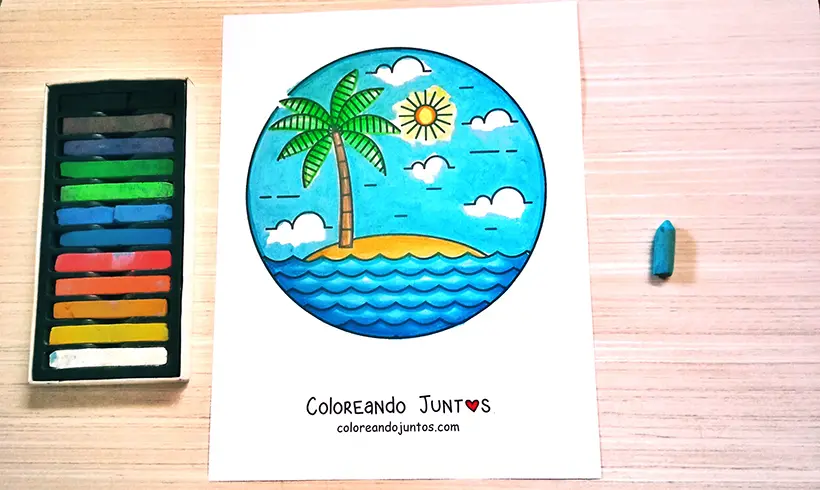
Step 1 (Optional): Surround your drawing by placing tape
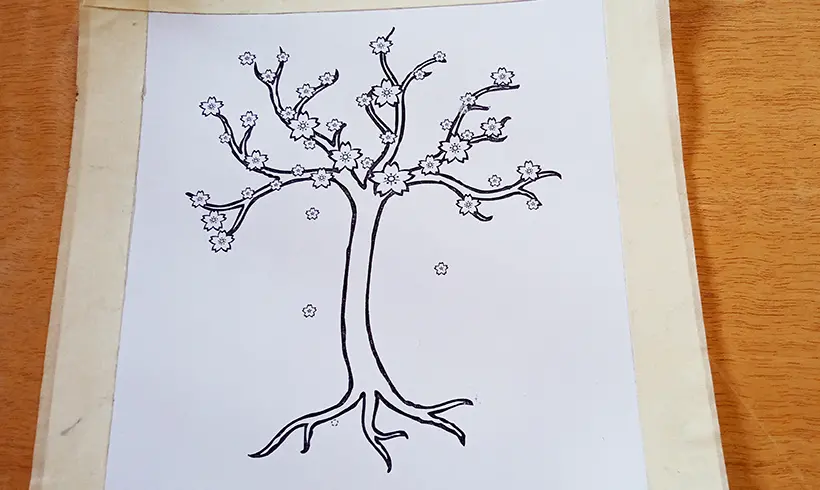
Chalks are an invasive material, what does this mean? That they can smudge very easily, especially if you use your hands.
In this case, to avoid smudging the paper or the table, I used tape to outline the drawing and thus get a precise finish with fewer smudges.
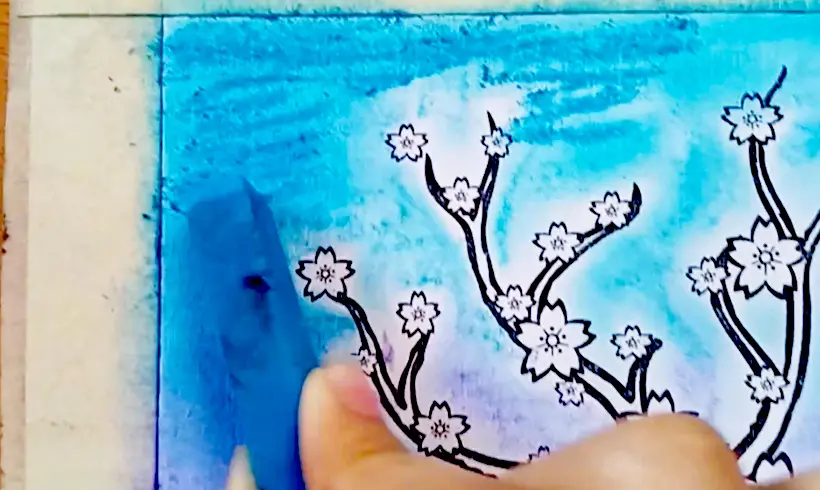
Step 2: Make a first layer of color with the chalks
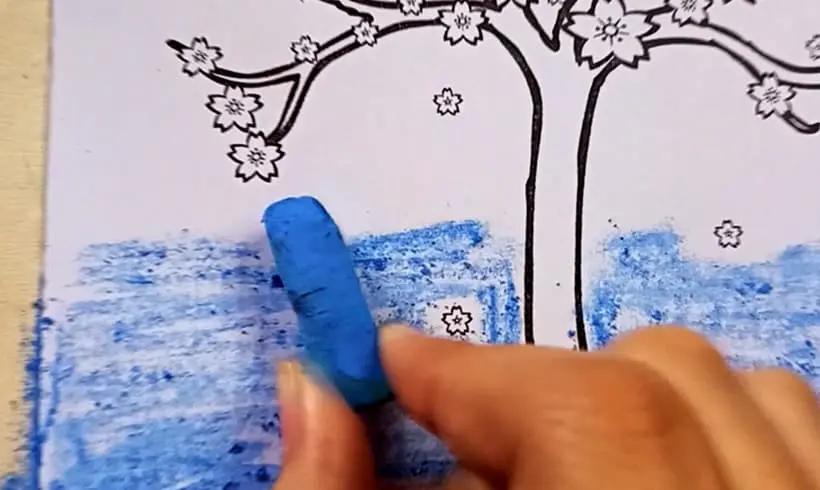
Start coloring with the chalks in the area of your choice, without blending. In this case I used them for the background. I combined three colors: light blue, purple, and dark blue.
But you can use whatever colors you want! That said, remember to clean your hands before taking a different chalk so you do not smudge it with the one you had taken before.
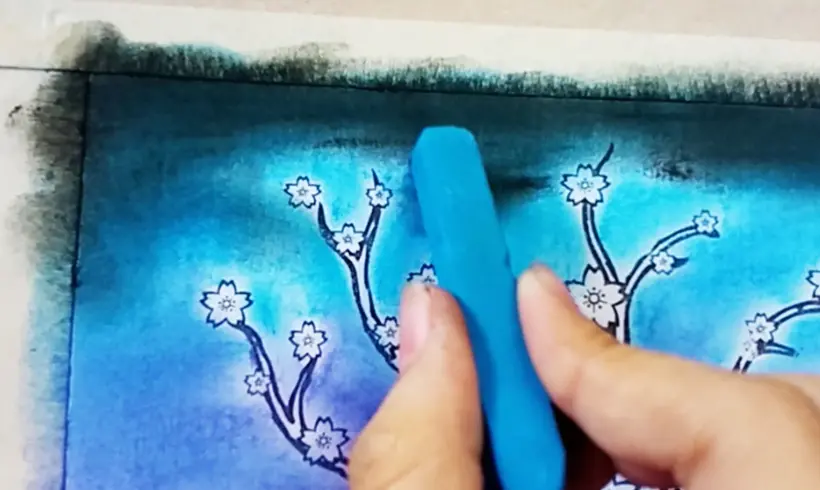
Step 3: Blend the first layer
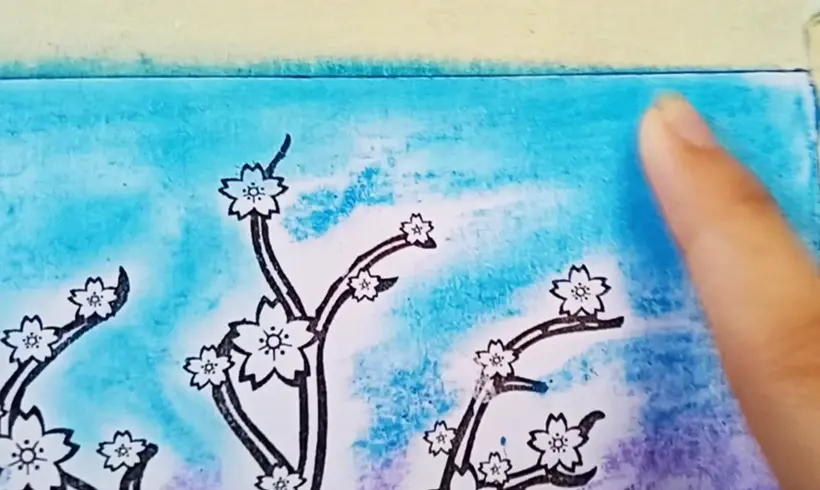
With your finger, a blending stump, or a cotton ball, blend the chalks in the direction you prefer. When you are going to make the transition between colors, remember to clean your finger so you do not smudge the other color too much. The goal is to achieve a gradient effect.
Step 4 (Optional): Apply a second layer of color
If you are not happy with the shades achieved with the first layer, you can apply a second one, so that you can intensify the tone. Once you do, blend and repeat the procedure as many times as you want.
Step 5 (Optional): Darken some colors with a bit of black

Black is not usually a very recommended color for painting because it smudges easily, especially when it comes to chalks.
That is why, instead of applying it directly on the paper, I placed it after two layers of blue color because I wanted to get a darker tone. After that, I blended.
It is important not to overuse the color black. It is preferable that, if you have the dark tone you are looking for, you use it instead of black.
Step 6 (Optional): Soften the black color with another layer of blue
In this case, to get a better gradient, I applied another layer of blue color over the dark tone previously obtained with the black. This way the effects of the black were softened and it combined better with the blue.
Step 7: Finish the details of your drawing with the materials of your choice!
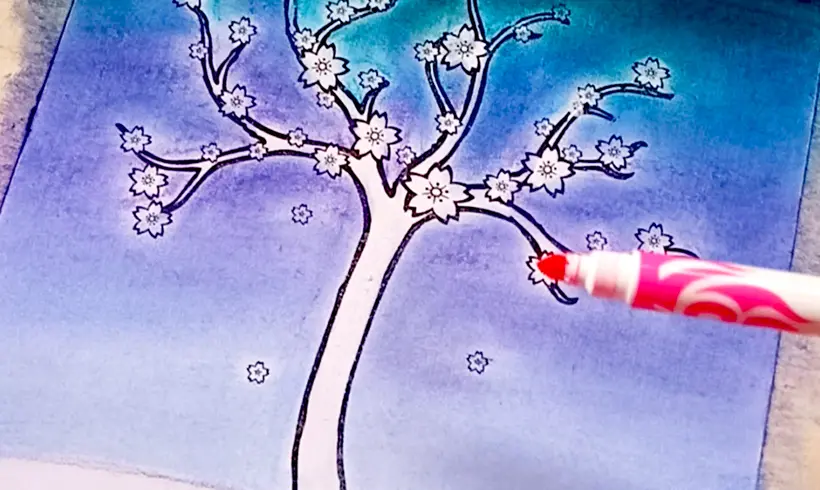
If you have a drawing with small details and do not have pastel chalk pencils, then take any other material to finish your drawing. In this case I used markers for the petals, and pencils for the trunk and the ground.
Step 8 (Optional): Remove the tape very carefully
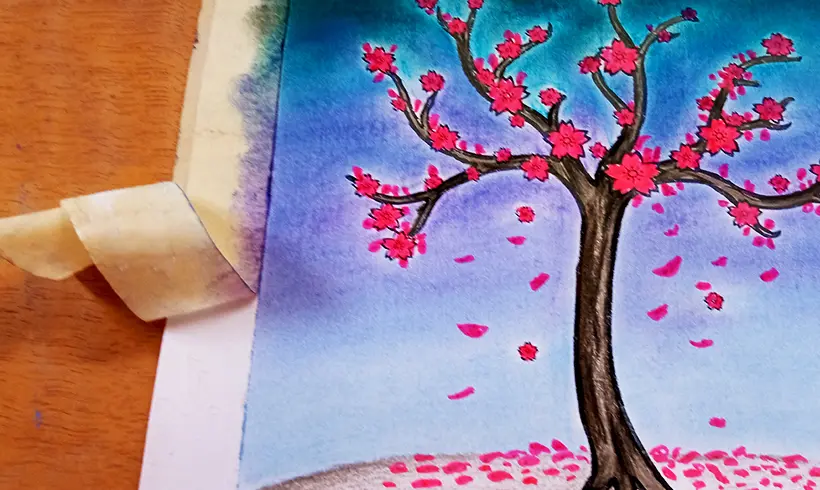
If you placed tape before starting, then remove it carefully when you finish the drawing. You will notice how good it looks!
Once I did it, as a final touch-up I added little stars in the sky with paint, applying the brushing technique. And that's it!
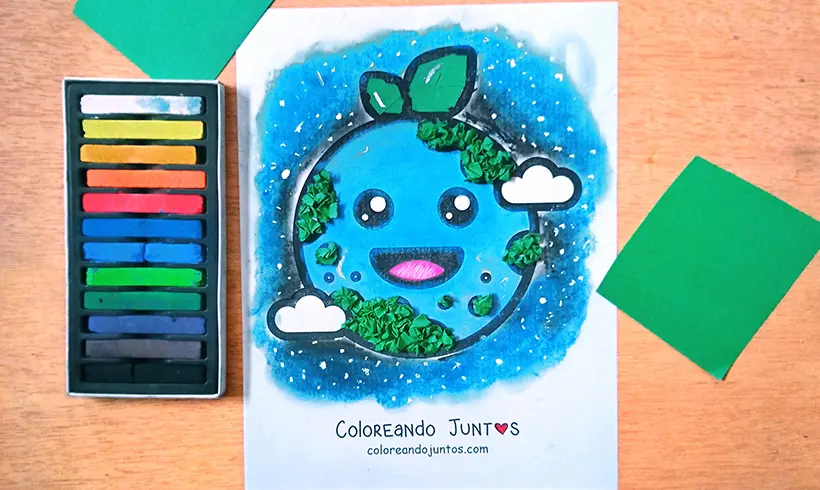
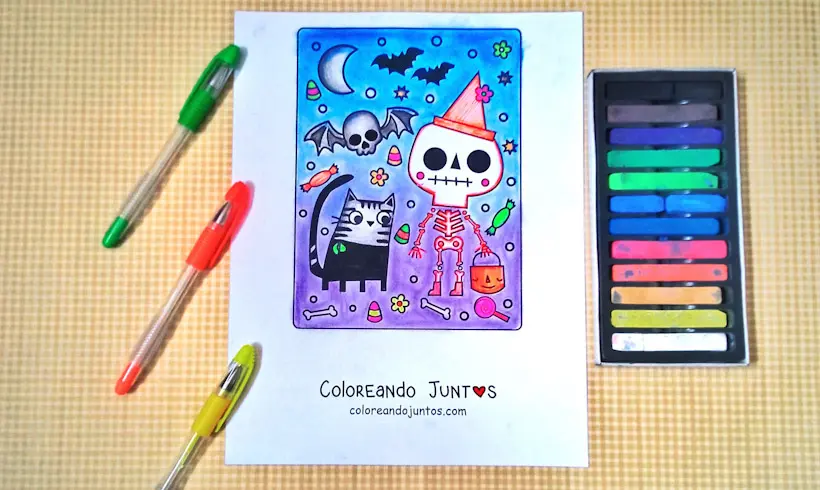
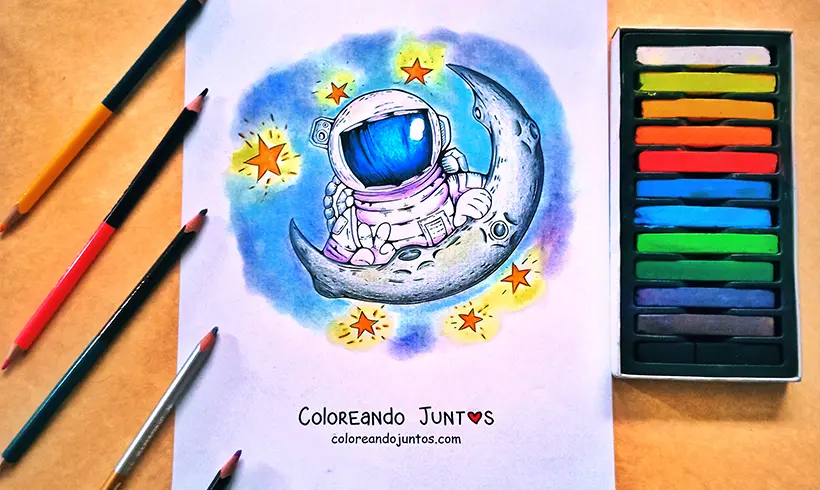
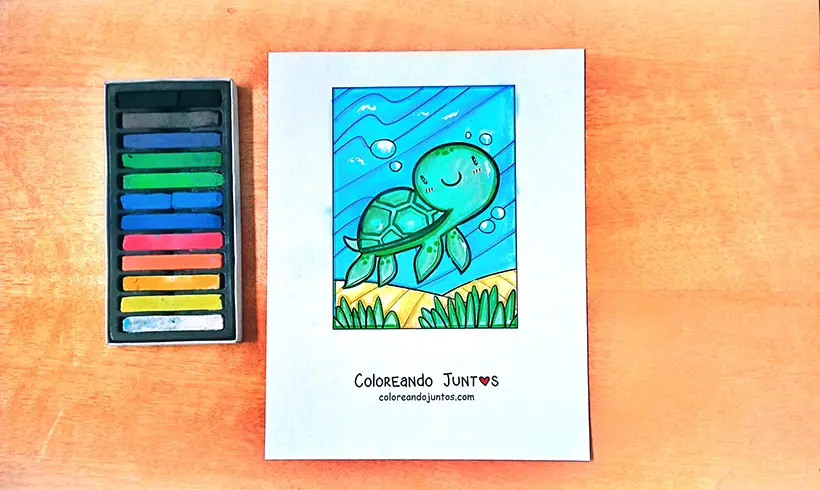
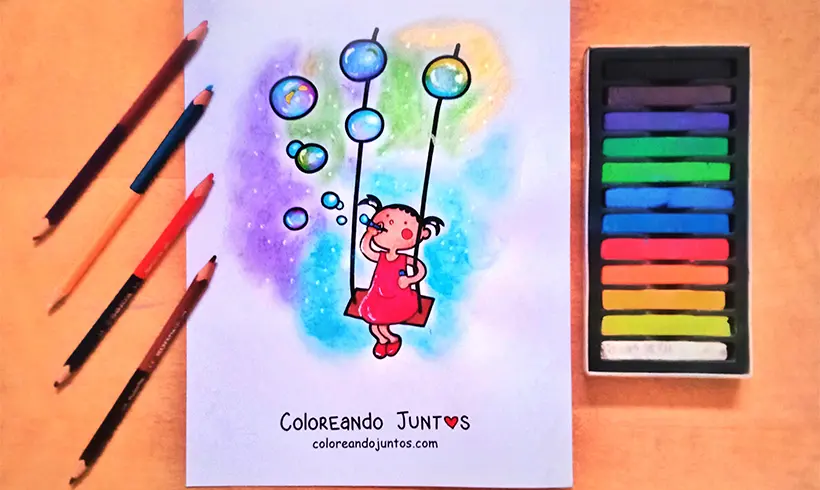
Examples of Pastel Chalks applied
Techniques you can combine with Pastel Chalks
If you are still not satisfied with the information we have given you, then we will tell you a little more about the techniques you can use with pastel chalks. After all, there are many ways to use them, right?
The techniques can vary depending on the kind of pastel chalk you have. For example: pastel chalk pencils will help you apply hatching and color in small areas; on the other hand, bar chalks are more effective for large areas.
- Shading: Using the edges of the chalks, whether in bars or pencils, you can shade the area of your choice. This way you will achieve a much more uniform and defined volume effect.
- Hatching: If you have pencil chalks you can get a much more interesting effect if you make lines in one direction and then crossing over them. You will get a weave with intense and beautiful colors!
- Gradient: According to the pressure you apply with the chalks and the number of layers you make, you will be able to get a gradient of colors, not only of the same shade, but of several. But remember to be tidy so you do not get unwanted smudges!
- Blending: You can blend with almost all forms of pastel chalks. By blending you will not only increase the color's reach, but you will also be able to combine the tones better.
Tricks and tips for coloring with Pastel Chalks
Did you know that the artists at Coloring Together decided there are still a couple more things to teach you? Let's go!
Pastel chalks are very interesting materials, but a bit complex to use, which is why we will give you some tricks and tips for applying pastel chalks. The rest will depend on you.
- Chalks are invasive materials, that is, they smudge easily in most cases. That is why you must be very careful when using them. Wash your hands frequently, after you finish using a color, do not forget.
- If you are going to color small areas in your drawing with chalks, take some kind of swab or cotton bud that lets you blend those small areas without going outside the lines. You could use some kind of homemade blending stump, or another material that suits you.
- If you are going to blend with your finger, use only one color and clean it if you will still use others. The ideal thing is to blend at the end of your drawing, when the small details are already colored.
- Depending on the type of pastel chalk, you will be able to combine colors, so always do the test on a separate sheet. This way you avoid direct mistakes on your drawing, and you will be able to see the finish of the combination.
Are you ready to start coloring with pastel chalks? The trick to becoming a true expert is to start practicing. Do not waste time! You will surely achieve an excellent result.